
Setting up a custom domain
There are two ways of setting up a custom domain. The first is to set up one domain to point to one project. The second is to set up one domain for the entire account. Each project will be accessible through the domain suffixed with the project title.
Setup a custom domain for a single project
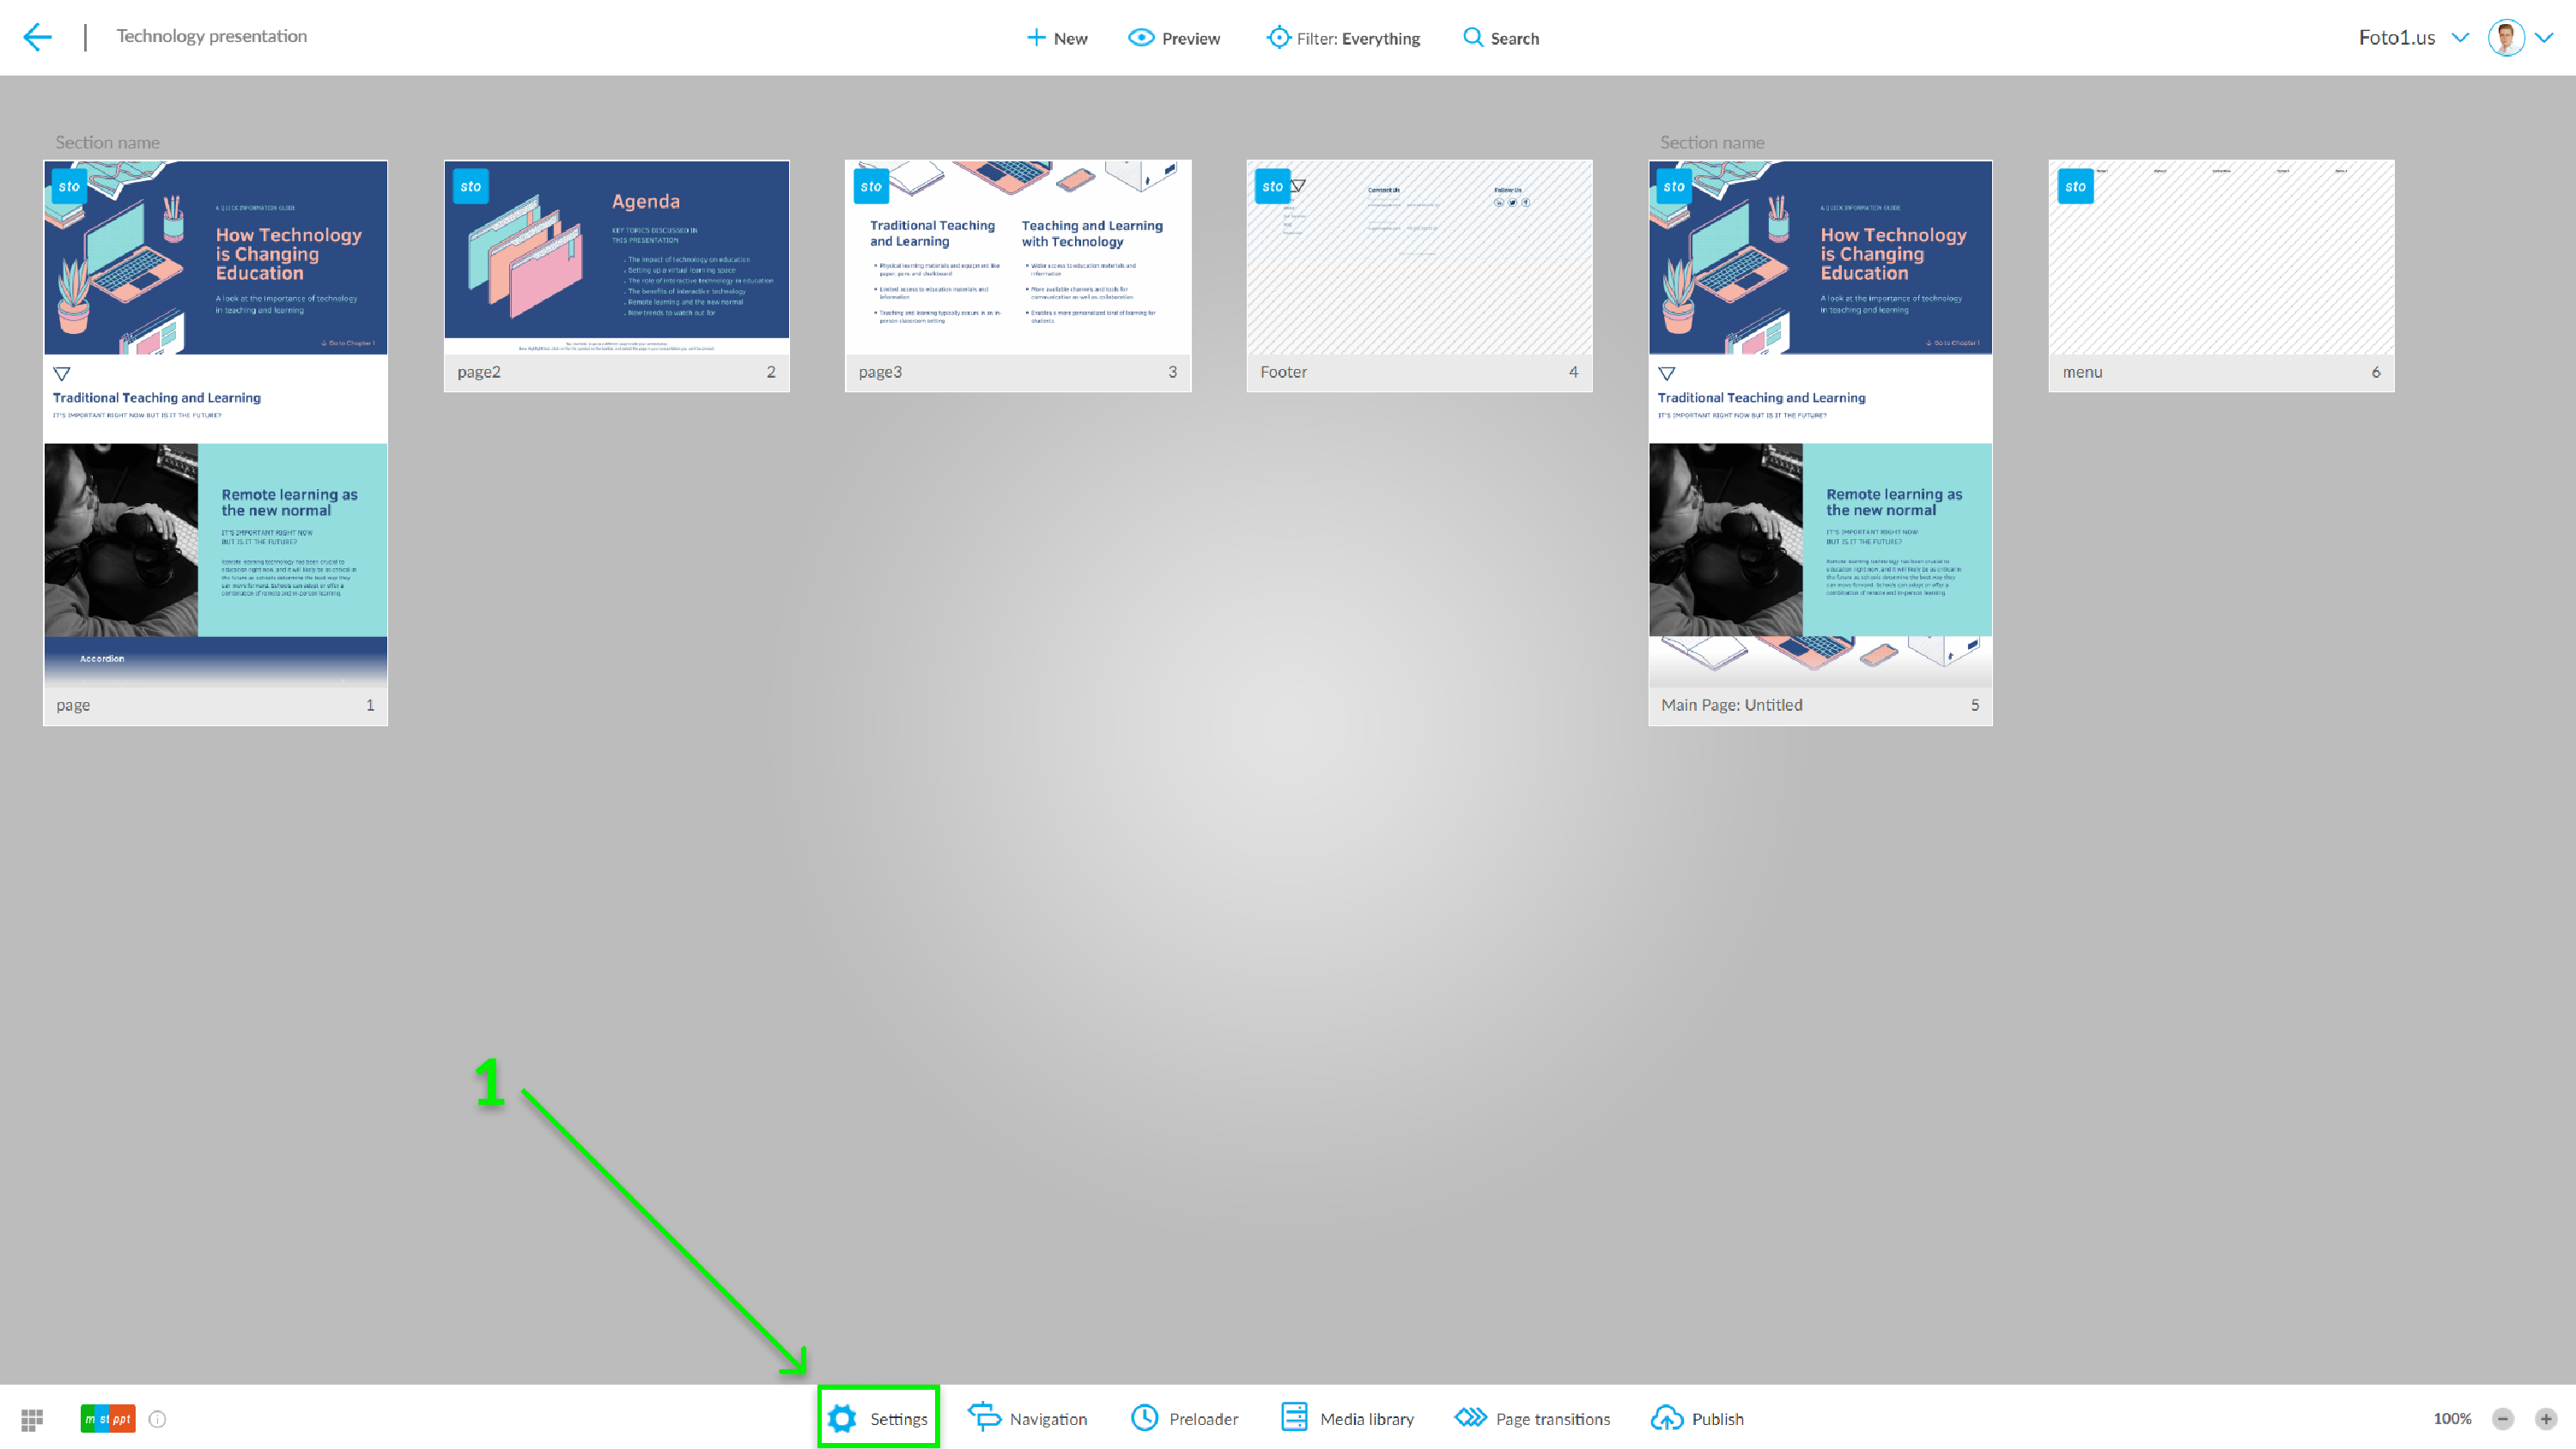
- Go to the Project Overview and click on the Settings button in the bottom bar
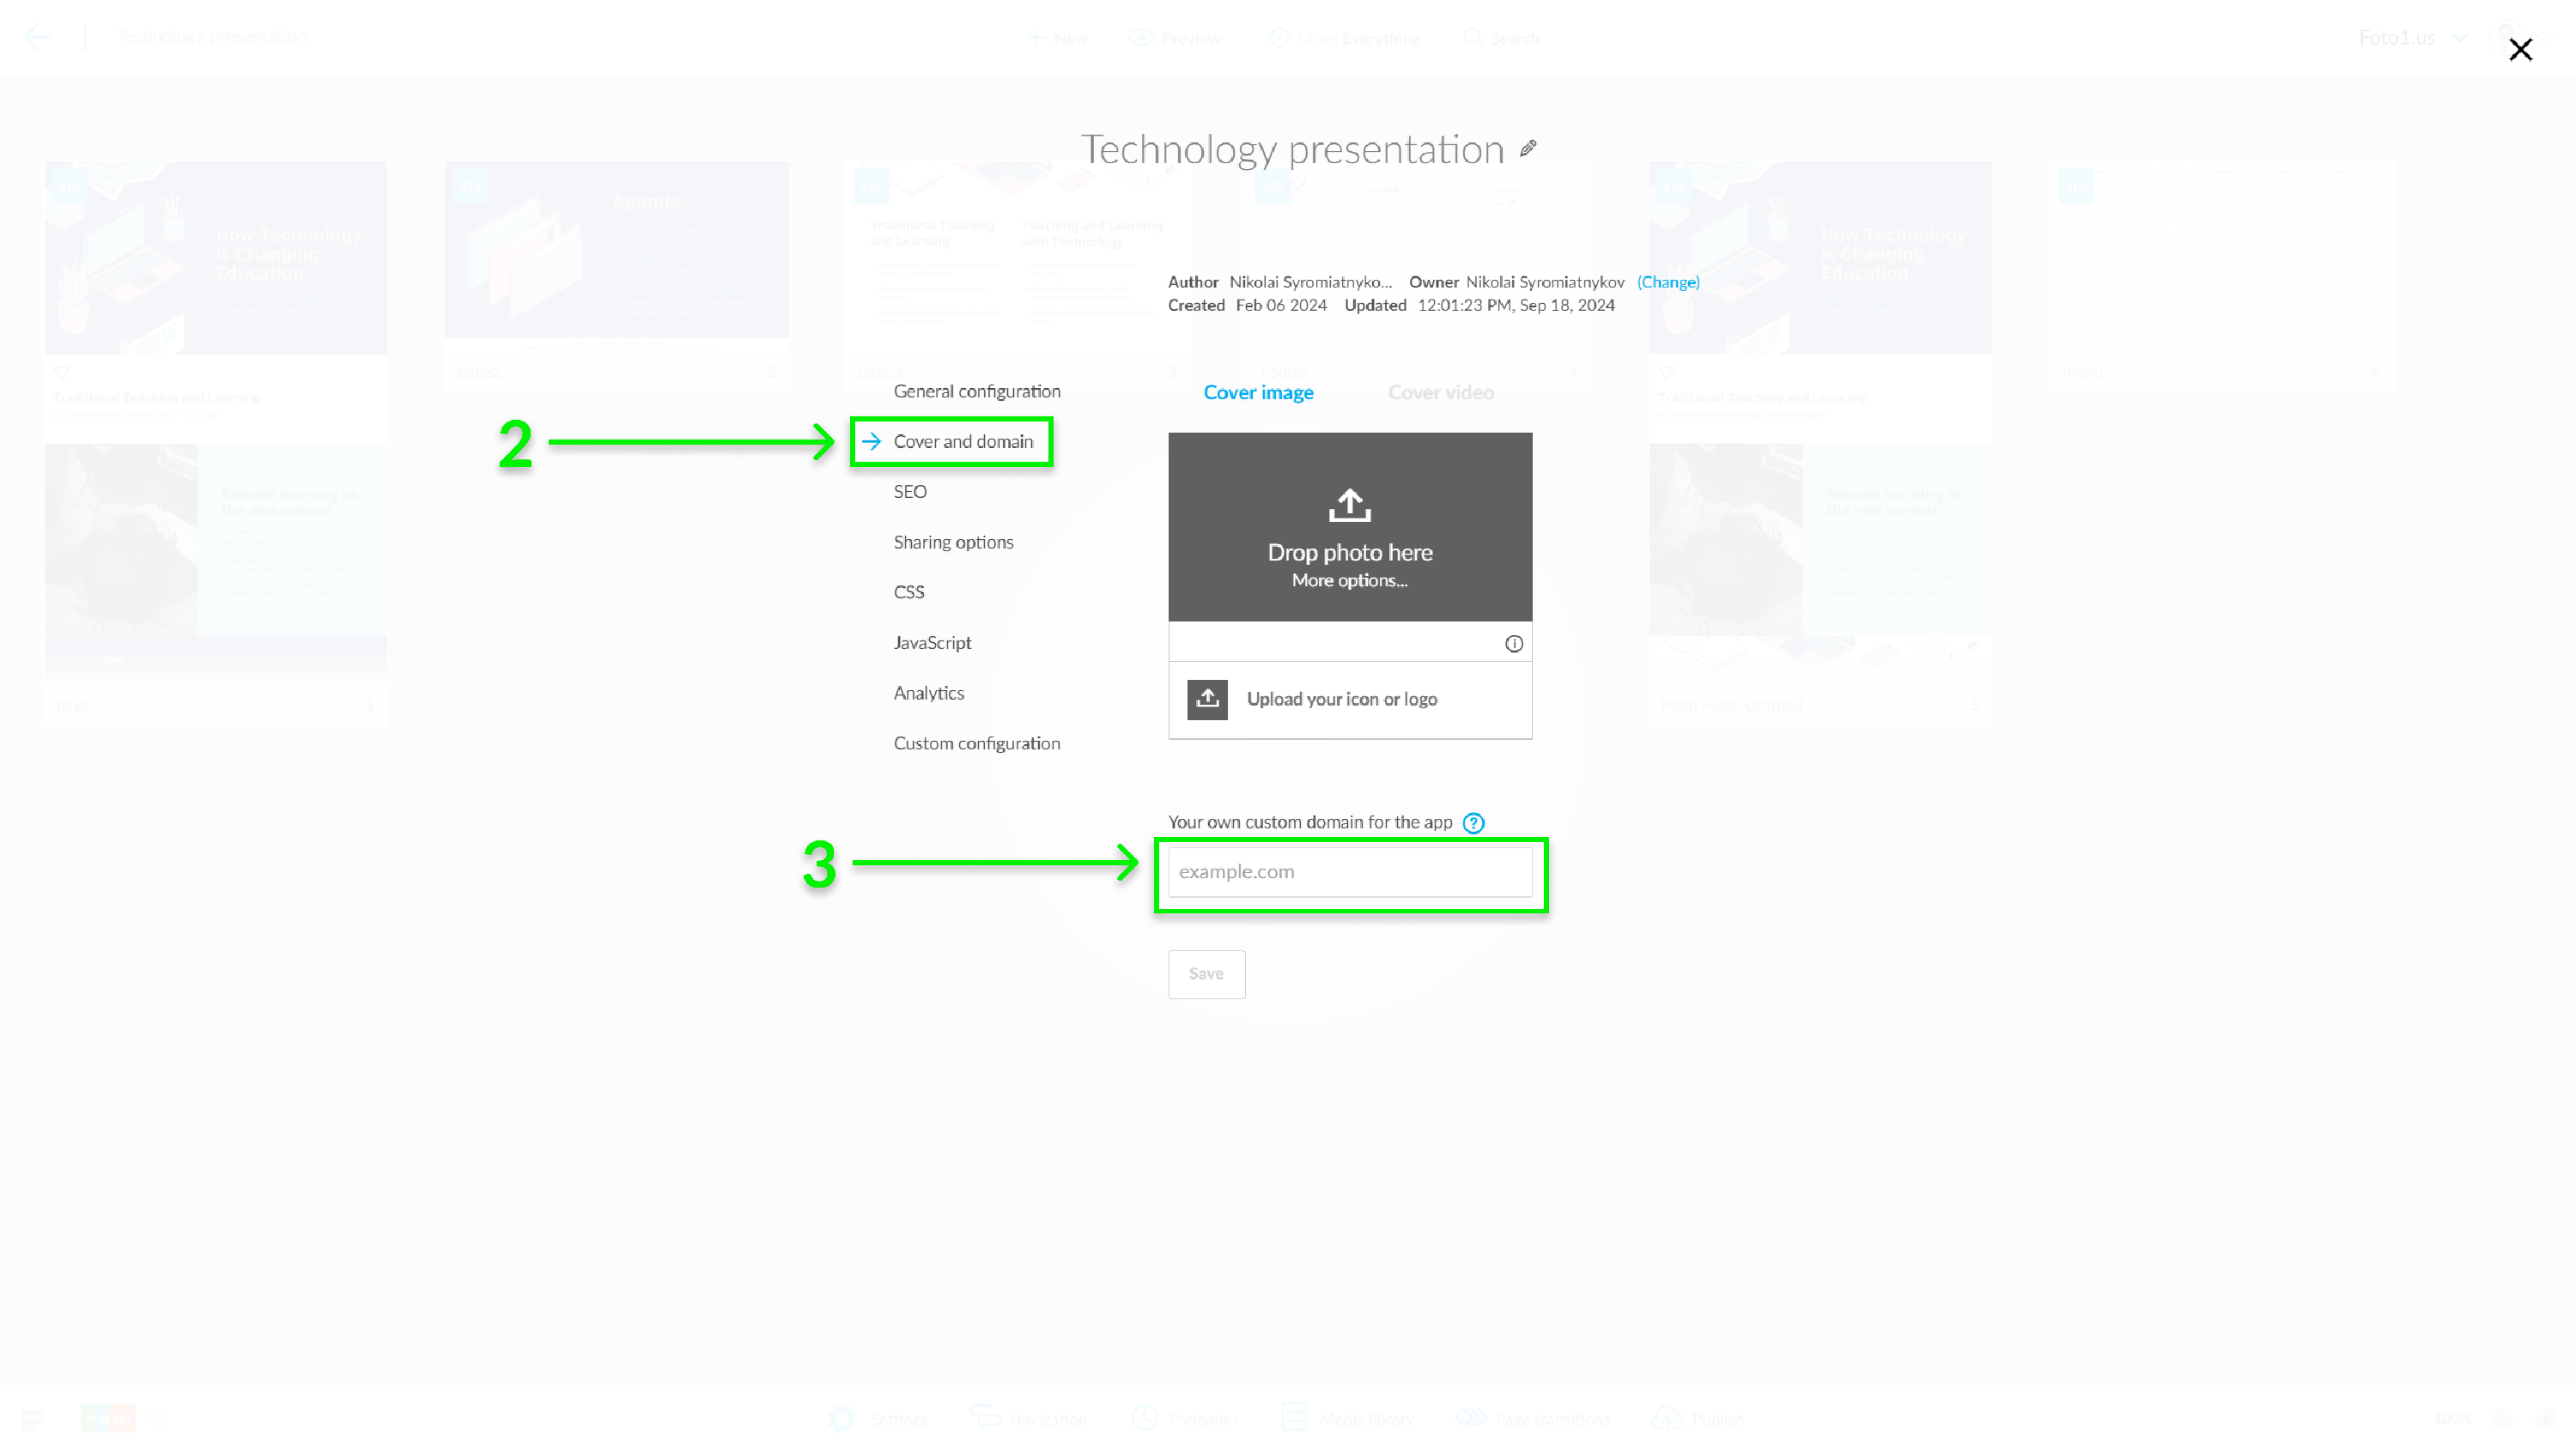
- Select the Cover and domain option
- Enter your custom domain. Click the Save button
-
Send a request to Storied Support to create an SSL certificate for your domain. Storied Support will provide CNAME records needed to verify the SSL certificate within 24 hours.
- Add DNS records at your DNS provider:
-
Add a CNAME record to forward your domain to Storied Cloud:
For example, to set up a CNAME for
yourdomain.comto point toapps.storied.co, here's what it would look like at Cloudflare, a DNS hosting provider:
DNS Provider - Forward your domain to Storied Cloud -
Add CNAME records to verify the SSL certificate
Storied Support team will provide these CNAME records (see step 4).

DNS Provider - Verify SSL certificate
-


Your project should be up and running when the domain name changes take effect. This can take up to 24 hours.
Setup a custom domain for a whole account with multiple projects
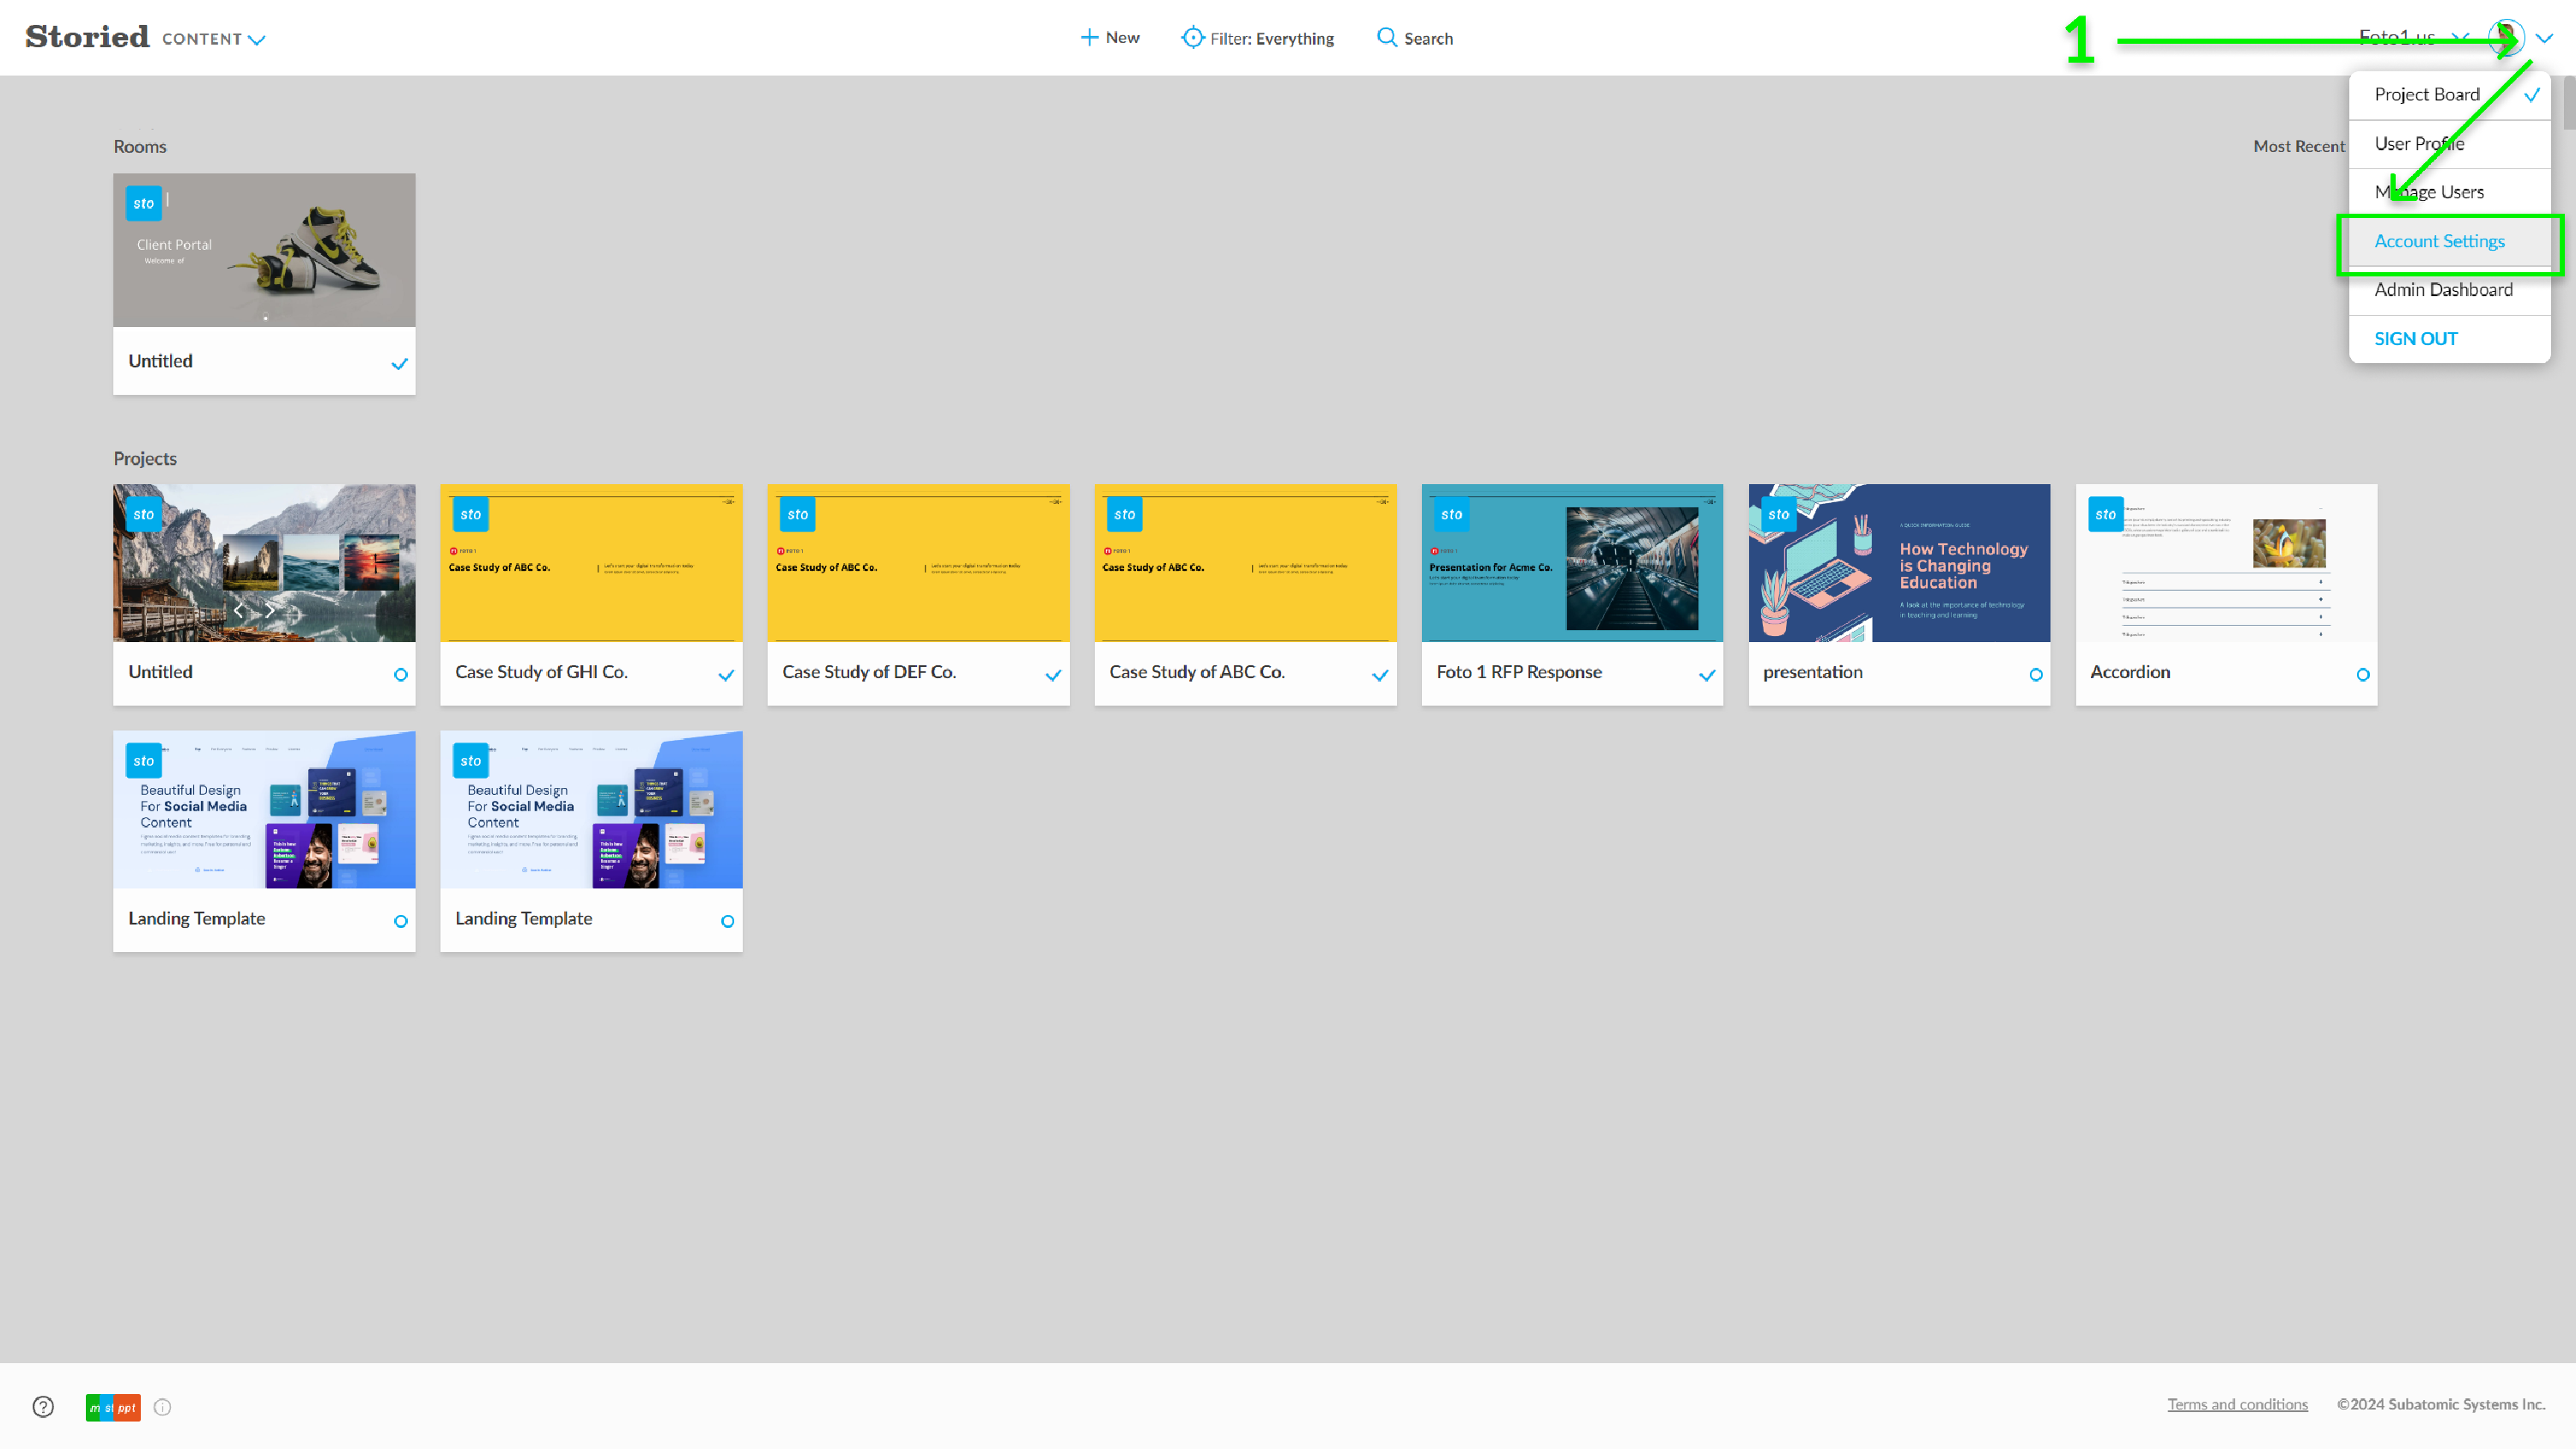
- Go to your Project Board, click on the downward arrow on the right of your profile photo, and select the Account Settings option
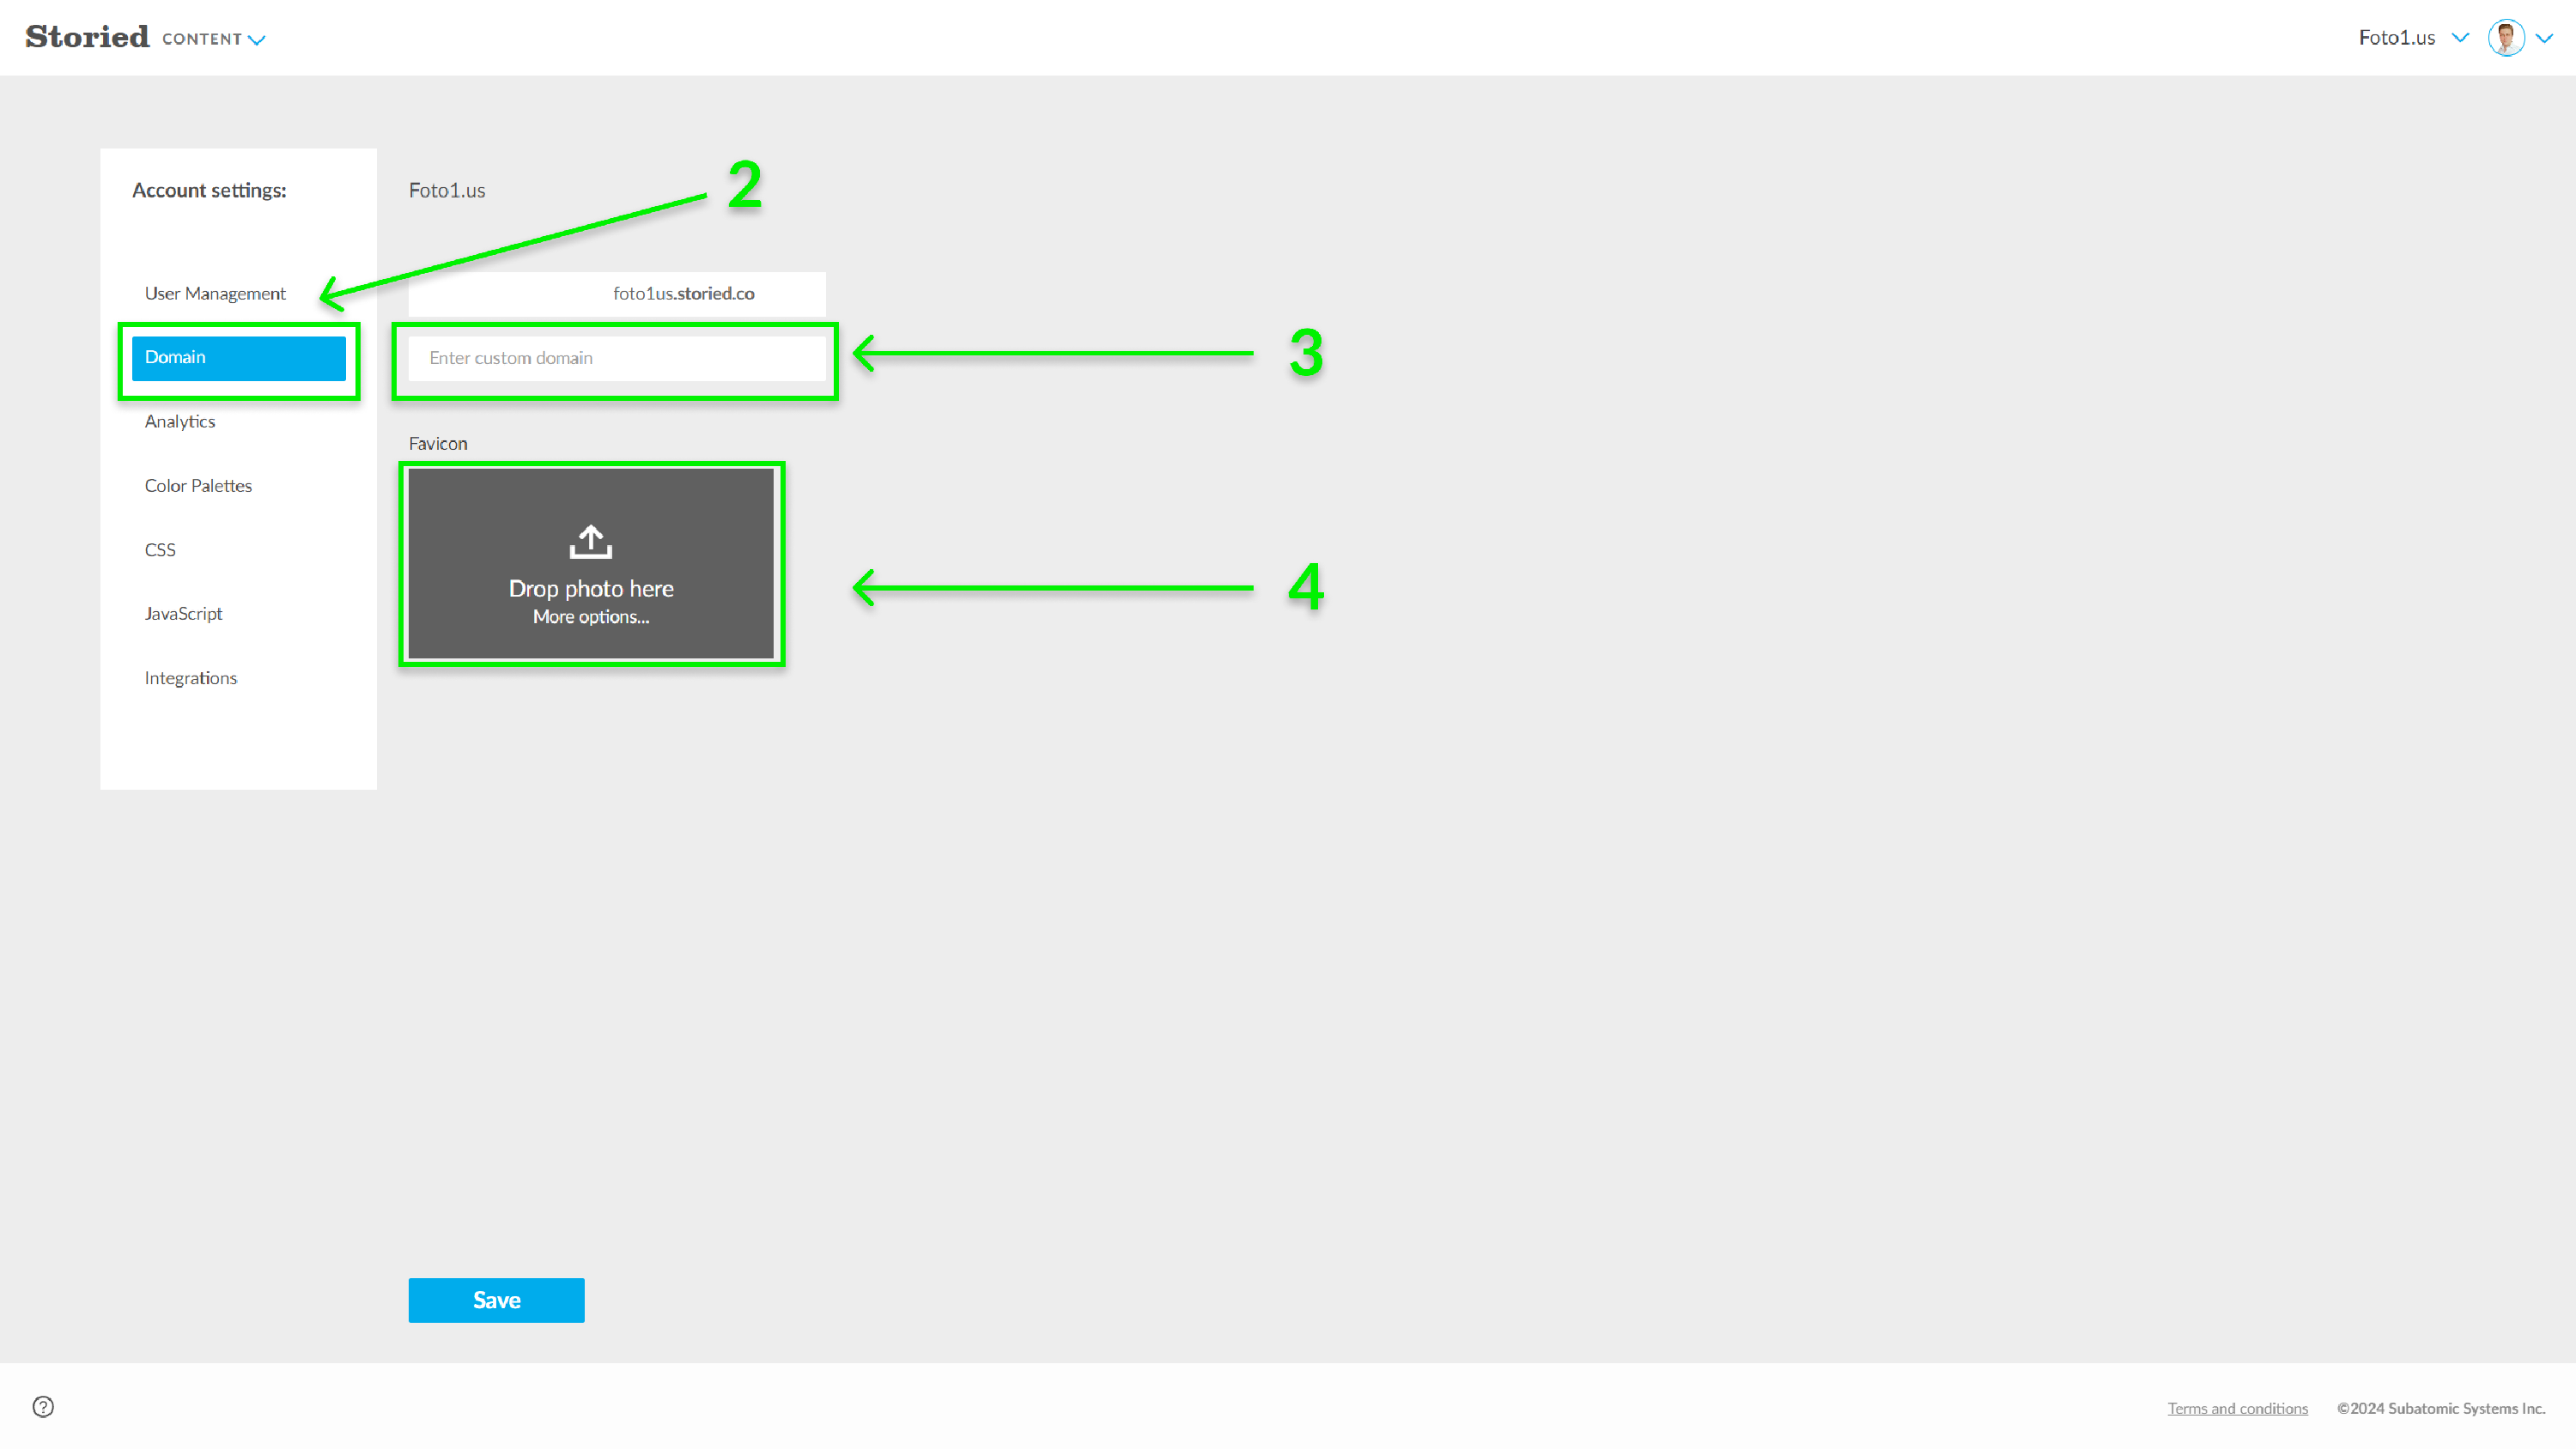
- Choose the Domain option
- Enter the custom domain in the Domain input field. Click the Save button
- Additionally, you can add a favicon here. Simply upload or drag and drop your icon into the appropriate field.
-
Send a request to Storied Support to create an SSL certificate for your domain. Storied Support will provide CNAME records needed to verify the SSL certificate within 24 hours.
- Add DNS records at your DNS provider:
-
Add a CNAME record to forward your domain to Storied Cloud:
For example, to set up a CNAME for
yourdomain.comto point toapps.storied.co, here's what it would look like at Cloudflare, a DNS hosting provider:
DNS Provider - Forward your domain to Storied Cloud -
Add CNAME records to verify the SSL certificate
Storied Support team will provide these CNAME records (see step 5).
DNS Provider - Verify SSL certificate
-
Every project that you publish will be available under this custom domain.
For instance, if your custom domain is features.brand.com and you created a project with a published URL https://brand.storied.co/my-first-article , then your project would be available under https://features.brand.com/my-first-article .
Note: You can also combine both approaches. Any project with its own custom domain will be available under that domain, as well as under the account custom domain.
If you need additional help or you’re not sure how to log in to your account at your DNS provider, you’ll want to reach out to their support for assistance. The support team at your DNS provider will be able to help you find the right format if these articles don't get you there — you can send them the link to this article to help them understand what you're looking to do if you're not sure how to explain it.
https://developers.cloudflare.com/dns/zone-setups/full-setup/setup/