
Creating custom quizzes
Storied offers ready-made quiz templates that you can fully customize to fit your project. Follow the steps below to create, edit, and configure your own quiz.
1. Choose a Quiz Template
- Open the Templates panel in your editor.
- Select a pre-created quiz template you’d like to use.
-
Add the quiz to your page layout.
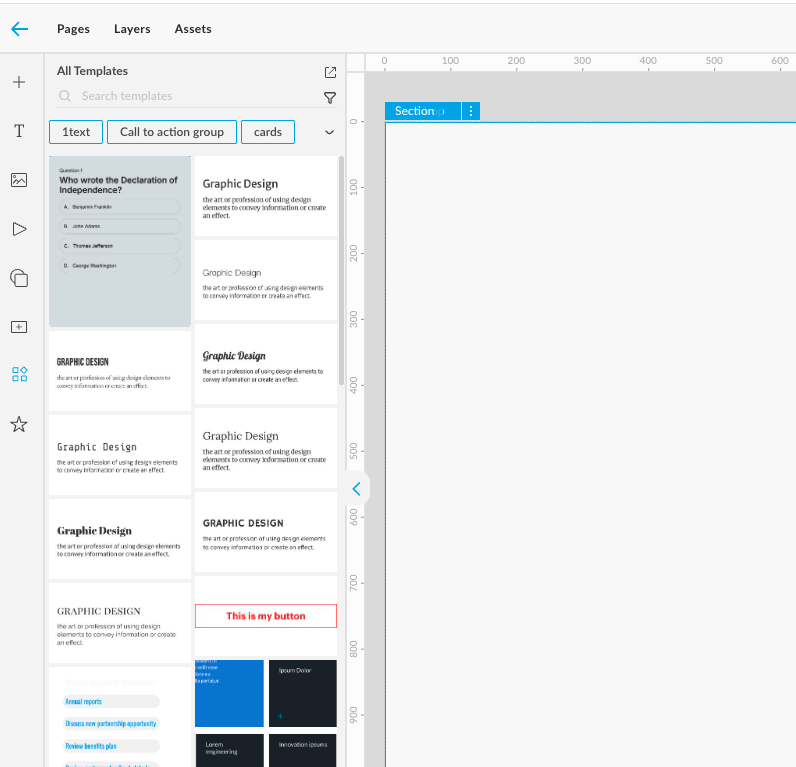

Once added, you can start customizing the quiz’s look and feel — including fonts, colors, and text.
2. Adjust Answer Options
Before editing answer logic, make sure your quiz has the right number of answer choices.
-
Preview the quiz to identify correct and incorrect answers.
Remove any extra options if your quiz requires fewer than the template provides.
-
For example, if the template shows four answers but your quiz has only three, delete one of the incorrect options.
Add more options if your quiz needs additional answers:
- Copy and paste an existing answer element (you can duplicate a wrong one).
- If your question allows multiple correct answers, make sure to duplicate a correct answer element as well.
-
💡 Tip: It’s important to keep the correct/wrong answer structure consistent so your quiz functions properly later.
3. Reorder Answers
If you’d like to change the position of your answer options:
- Select the answer element you want to move.
- Use the arrow buttons to move it up or down, or
-
Click and drag the element to reposition it manually.
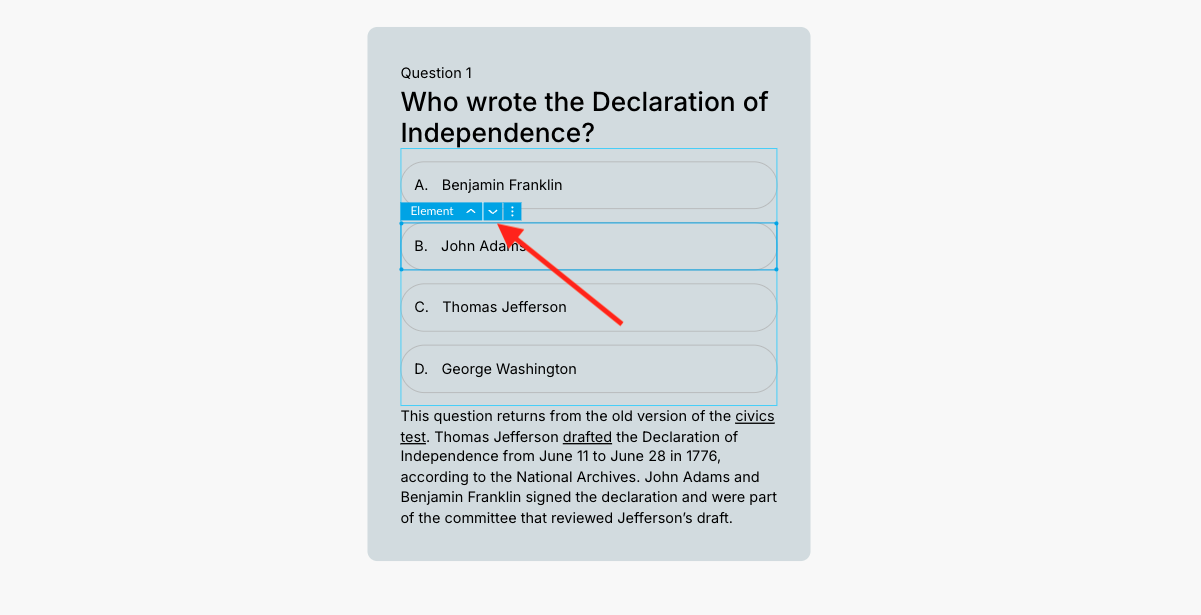

This allows you to control the order of correct and incorrect answers easily.
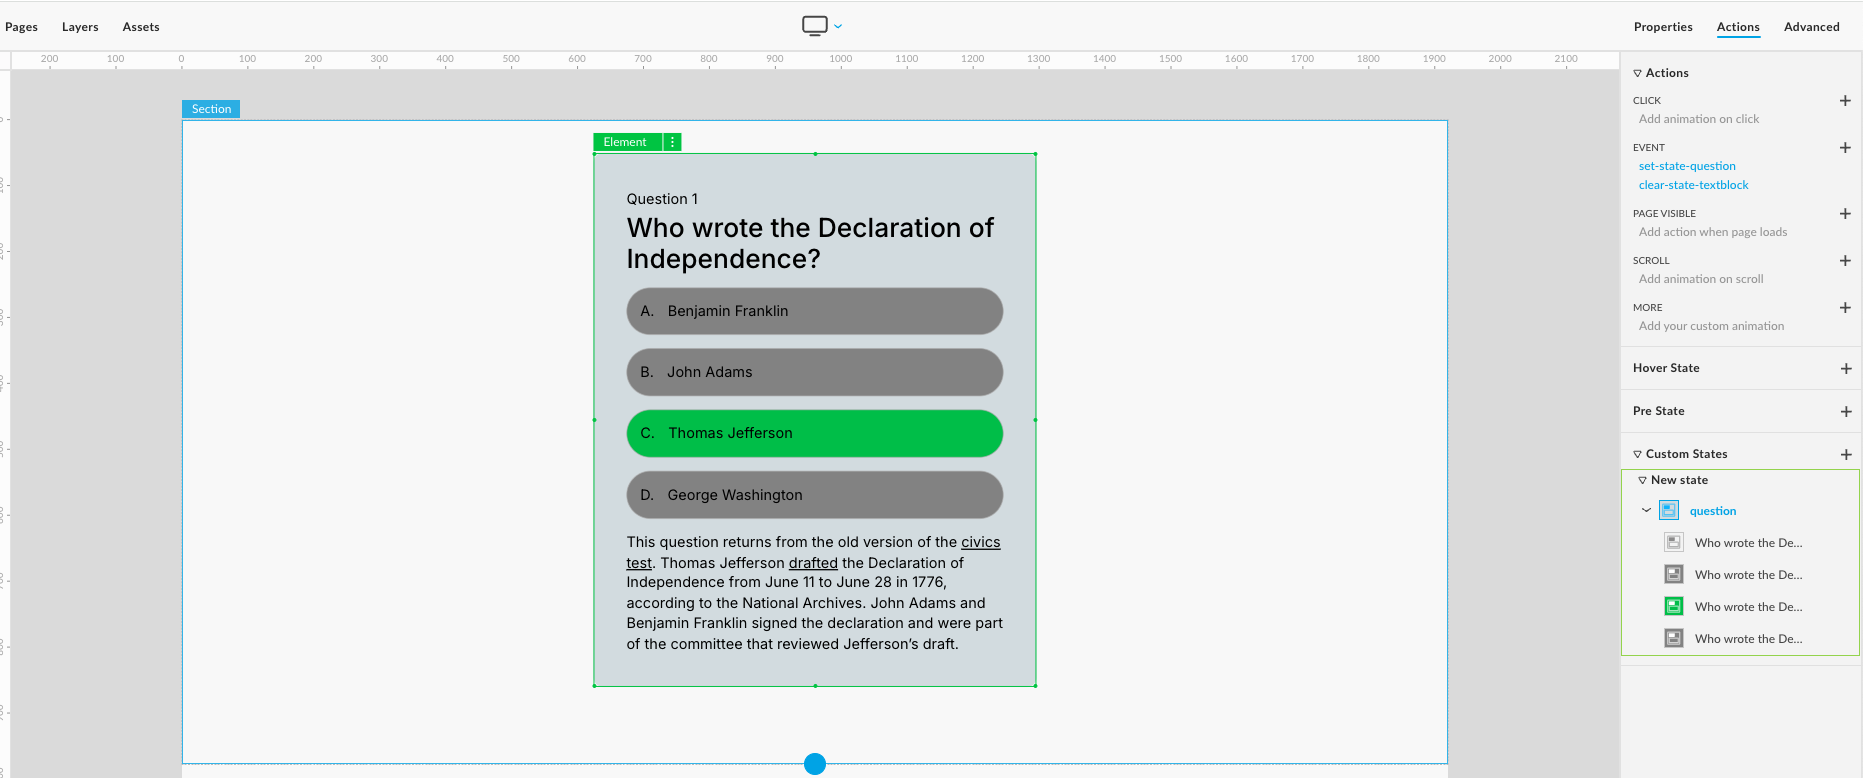
4. Style Correct and Incorrect Answers
After finalizing your answer list:
- Adjust the visual styles (colors, highlights, icons, etc.) for correct and incorrect answers.
-
This helps users clearly see which responses are right after submission.

5. Configure Answer Attributes
To ensure your quiz records metrics and responses correctly, you’ll need to edit each answer’s attributes.
- Select an answer element.
- Open the Advanced panel.
-
Go to Styles → Attributes.
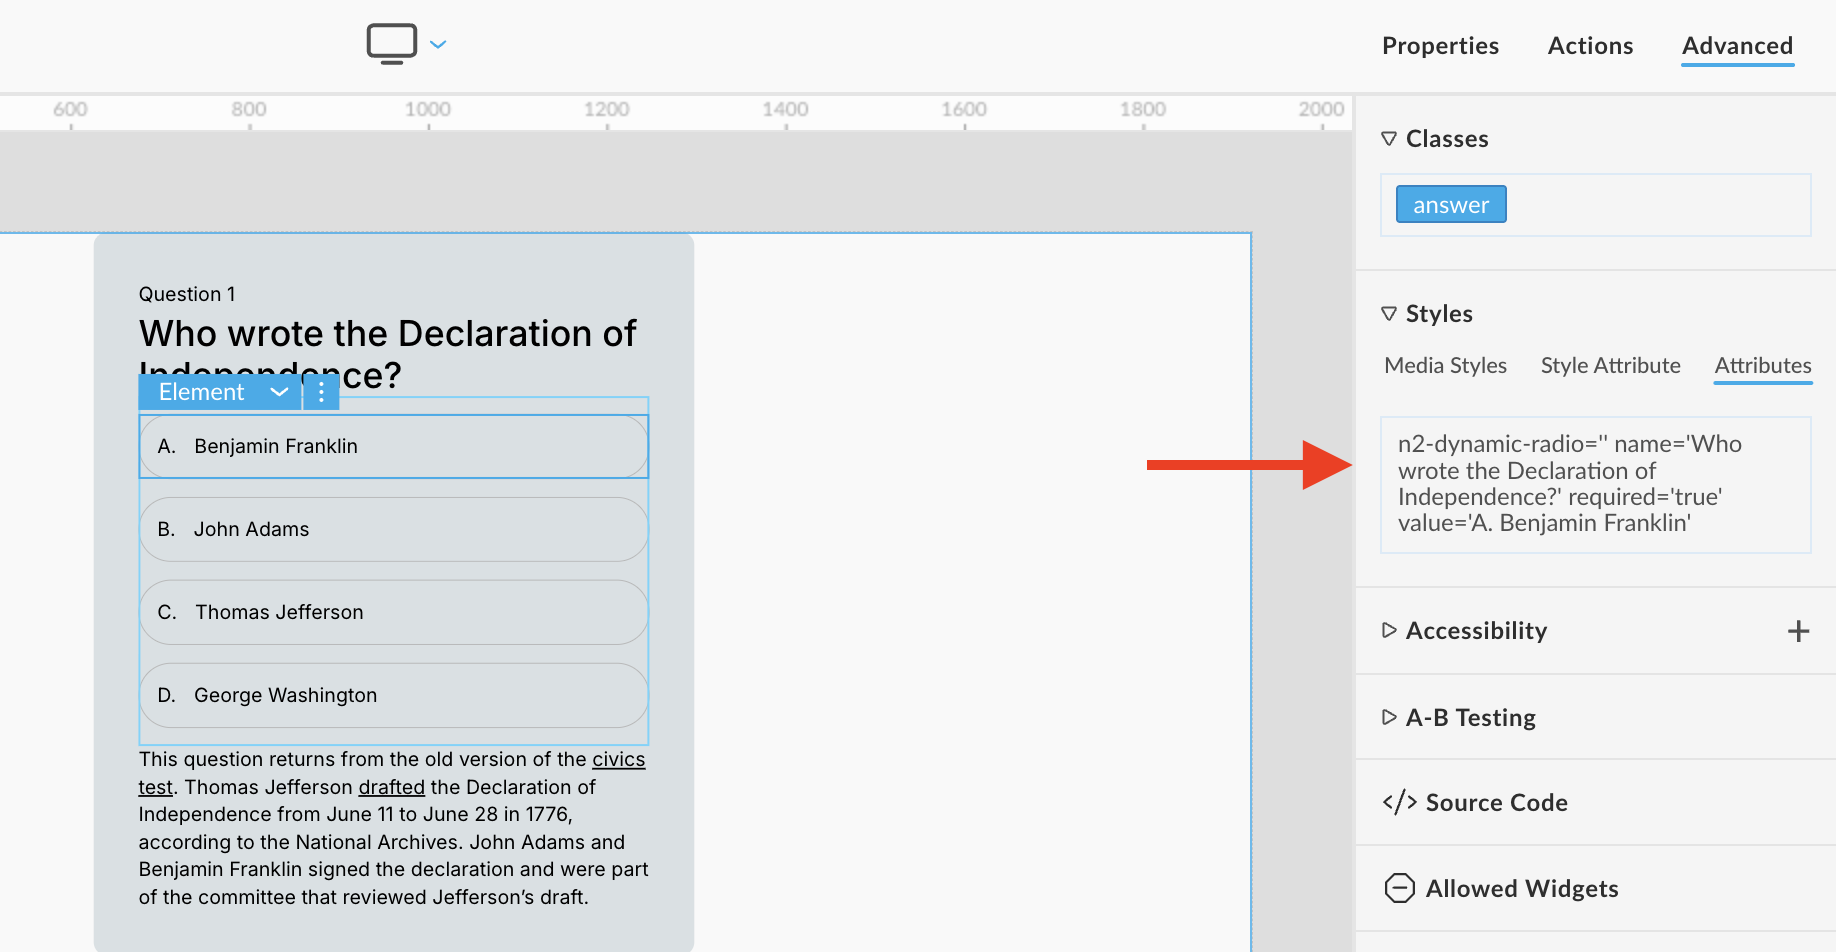
- Update the following fields:

• Name
Replace the default text with your quiz question.
Example:
name="Who wrote the Declaration of Independence?"
→ becomes
name="What is the capital of France?"
• Value
Replace the text with your answer choice.
Example:
value="B. John Adams"
→ becomes
value="A. Paris"
- Repeat these steps for each answer element in your quiz.
6. Preview and Test
Once all answers are configured:
- Preview your quiz again to ensure correct answers respond as expected.
- Verify that all options and metrics track properly in your dashboard.
✅ You’re all set!
Your custom quiz is now ready — fully styled, functional, and trackable in Storied.